Introduction
The Gladly Help Center code snippet enables you to build an FAQ/help page on your website powered by Public Answers in Gladly’s Answers knowledgebase. It works by injecting a javascript file and a css file into the webpage that you choose to embed it in. The Help Center has some content structure, but applies minimal CSS by default, allowing for the CSS you already have in your website to override and make it feel like a natural extension of your website right out of the box. The minimal CSS applied tries to achieve a balance of minimal structural defaults and using your site's own CSS to fill in more of the brand specific styling. This happens automatically due to the way CSS definitions "cascade" or apply to the elements in your webpage. You can generate and structure your own Help Center code snippet by navigating to the Help Center admin page in Gladly.
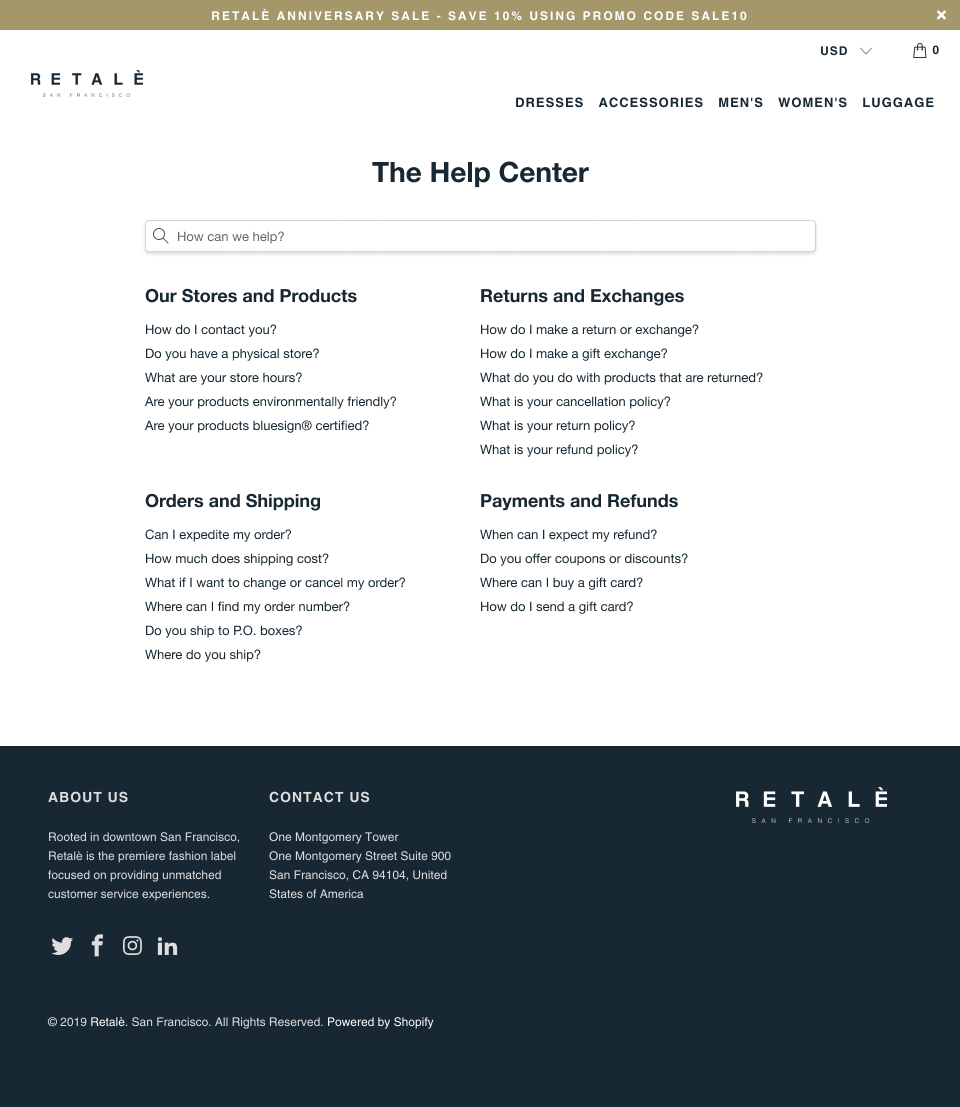
Help Center Styling Example
The following screenshot is a sample of a Help Center that is styled to match an existing ecommerce site.

Browser Support
The Gladly Help Center supports major browsers. For the desktop, we support current + previous major versions of Chrome, Firefox, and Safari along with IE11 and the current version of Microsoft Edge. For mobile, we support current + previous major versions of Chrome on Android and iOS and the current + previous versions of Safari on iOS.
Javascript Frameworks and Single Page Applications
Help Center currently has some limitations working with Javascript Single Page Application (SPA) Frameworks. Next.JS is not currently supported. Help Center may work with other SPA frameworks but is not guaranteed. Help Center itself functions as an SPA which can cause navigation issues with other frameworks. The best solution is run Help Center from a single HTML page that is not part of an existing SPA.
How to Override Styles
It's easy to override any of the styles defined in the Styles section:
- Create a new
.cssfile or<style>tag within the webpage where you have installed the Gladly Help Center snippet. - Using the Styles section below, find the CSS class name of the element you want to override and create a css selector definition in your file or style tag.
- Test your modifications by reloading the page, thats it!
What Can I Change?
Because we place a specific CSS class on almost every element we add to the page, you can really do anything that is possible with CSS. Some basic examples include:
- Changing the hover color of search results
- Changing the
border-radiusof the search input - Adding borders to the FAQ sections